Friday 18 December 2015

Location : also some lighting.


Choosing the location of our film was a hard decision. We needed an area which had a door to create a dramatic entrance. Our first choice of location was the front of the college as it had two side’s doors and a rotating door in between the two.  We wanted to use the revolving door as would create a dramatic entrance. We decided not to use this location as their where always people leaving or coming into the building so it was difficult to film with so many people around.

The next location we agreed upon was the Colleges common room. It was a great location as we would film during lessons when not many people where in there. We needed to be careful where we set up filming and lighting equipment inside in case people did come into the common room. We also had to be careful of the amount of tables and chairs and be aware of the dangers in case we tripped over the equipment and harm ourselves. In the end we decided not to use this location as the lighting wasn’t the dramatic effect we wanted.

We set up the lighting in the common room and set up the filming equipment to make sure we got the correct lighting, in doing this we figured out we couldn't get the lighting we needed and changed location.


Third time lucky, we finally found a location in which we could achieve the lighting effect we wanted without people walking in front of the camera and ruining out footage.  The music recording room provided us with the correct space in which we could film.

We had to move the pianos and drums and varies other bits of music equipment around to position the tables and chairs ready for our footage to be shoot. In doing this we eliminated many health and safety risks. We moved wires and large pieces of equipment out of the way to ensure a safe place to work.We finally decided to use the music rooms as our space to record the footage we needed.

Example of the dramatic lighting we wanted for our footage in some of our shot reverse shots as well as the lighting we wanted to use for the 180 degree shots as well.


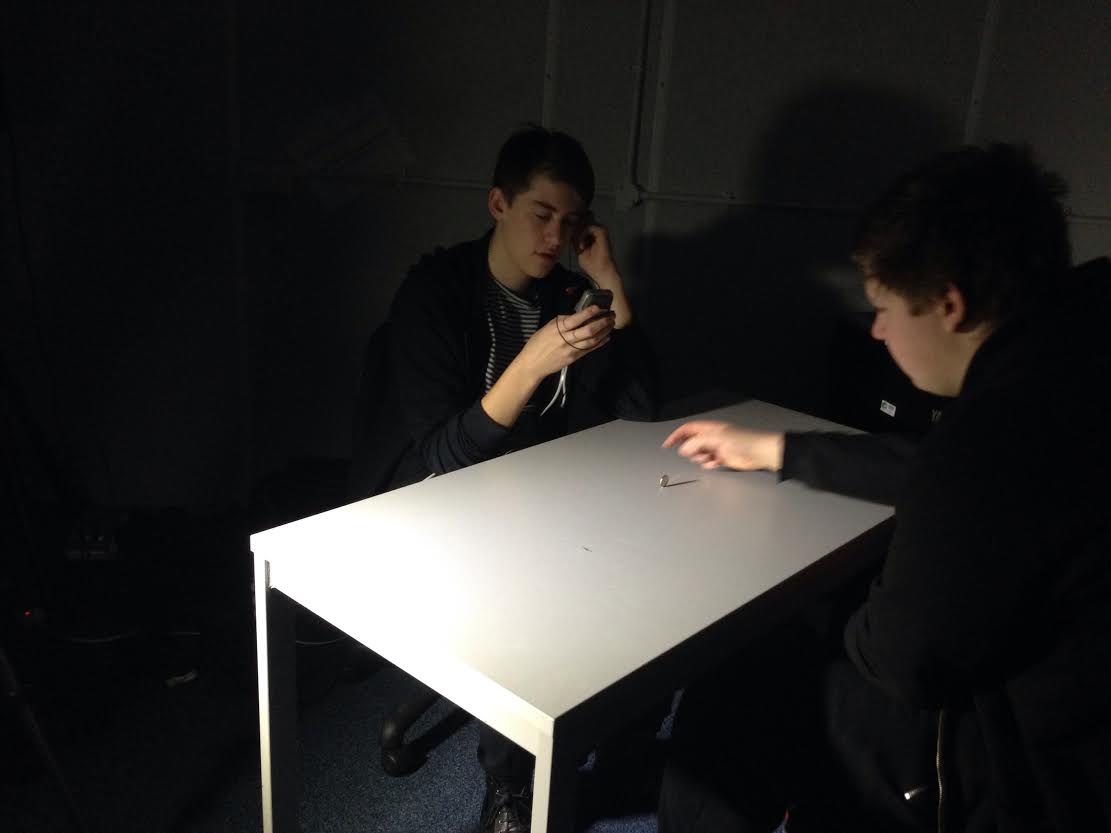
This is the lighting we created in moving locations. Compared to the story board we created it fits out imaginations perfectly. We managed to create the perfect lighting by only lighting one corner of the room and turning off all the lights in the room but the lighting equipment in the corner.

Tuesday 8 December 2015

Allocating tasks to group members

As their are only two members in our group we decided to take on each task together. We will both be shooting with the camera whilst the other records sounds and switch roles when necessary.

Freya created the story board for this project with input of different continuity editing technique from Briony. Together we have created a unique story line for this task.

Together Freya and Briony shall share the tasks which are:

  • camera operator
  • sound recorder
  • story board artists
  • location scout
  • prop manager
  • casting director
  • director or filming

    Sharing theses tasks will make the process easier and we both get to demonstrate our skills at each tasks.

 
MATCH ON ACTION


Match on action is a technique in which a character interacts
In this example there is a match on action as in one shot you see her reach for the book and in the next there is a close up of her interacting with it.
Match on action is a continuity technique which captures the viewers’ attention to a certain object or action taking place in the scene. Match on action is created by simple cuts between shots in a scene.

For example this video shows a girl in a library. We see the girl approach a book shelf and take out a book. We cut to a close up of the book in the girls hand as she is turning a page. This use of simple cuts between shots and a close up of the object in the girls hand shows that the book is the main focus of the scene. This shows the viewer that the book is important to the female character.

Match on action captures the viewers’ attention and helps shows the importance of an object or action in the scene. This technique also helps a scene flow continuously as it doesn’t have to display is importance during a different scene. Match on action is used in horror and thriller films as they can also build suspense and anticipation.


SHOT REVERSE SHOT
Match on action is used when two characters are having a conversation with each other. This type of technique is usually started by a point of view or over the shoulder shot. This shot is followed by a reverse angle shot of the character looking at the other character.

In this example photo we can see a shot reverse shot being used. An over the shoulder shot of the female character allows the viewer to see the male character. We then see an over the shoulder shot from the male character to see the female character. This would be repeated as the character speak to one another. This allows the viewers to follow the conversation as well as see the characters facial expressions as they talk to engage the emotions they are feeling.


Shot reverse shots are commonly linked to the 180 degree rule as a shot reverse shot can distort and disorientate the viewer if not done correctly. Shot reverse shots have to follow the 180 degree rule as it cannot confuse the viewer perspective about the location of the characters in the scene.


180 DEGREE RULE


The 180 degree rule main function is to show communication between two characters interacting, normally having some sort of dialogue spoken between the two. This technique allows the viewer to see how the characters react to each other and show the importance of what they are saying.
To create and use this technique correctly is helps to imagine a line running from one character to another. This line between the characters shows the correct side to place the cameras on.You can only place the cameras one side of the line. This diagram shows the correct way to place the cameras.


We place the cameras on one side of the line so we keep the characters parallel to each other, the stay on one side of the screen, this allows the conversation to flow between characters as well as making it easier for the viewer to follow.


Placing cameras on both sides of this line can create a disorientation experience for the viewer. Breaking the 180 degree rule and placing cameras on both sides of the line can create confusion and makes it harder to follow who is speaking. A good example for breaking this rule is an example from The Shining.

The rule is broken and the character switch position as we cut from camera to camera, this is to create confusion and a sense of discomfort. Not using this technique, in this example, shows the mental trouble displayed by the main character and helps to provide evidence of a paranormal experience as well as create subtle sense of uneasiness.